
A leaking, smelly, or wobbly toilet is almost always caused by a worn-out toilet seal (wax ring or foam & putty gasket). Luckily, replacing it is one of the easiest DIY plumbing projects you can do. No expensive plumber, no complicated tools—just a new seal, basic supplies, and 15–20 minutes.
This guide shows you exactly how to install a toilet seal with putty properly, so your toilet stays leak-free, odor-free, and stable for years.
What Is a Toilet Seal & Why It Matters
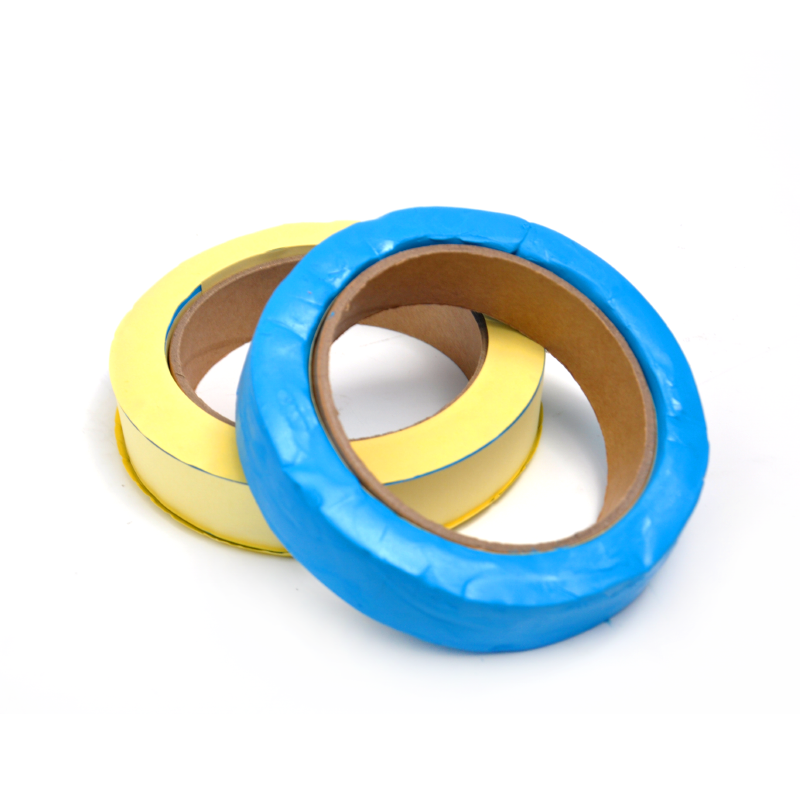
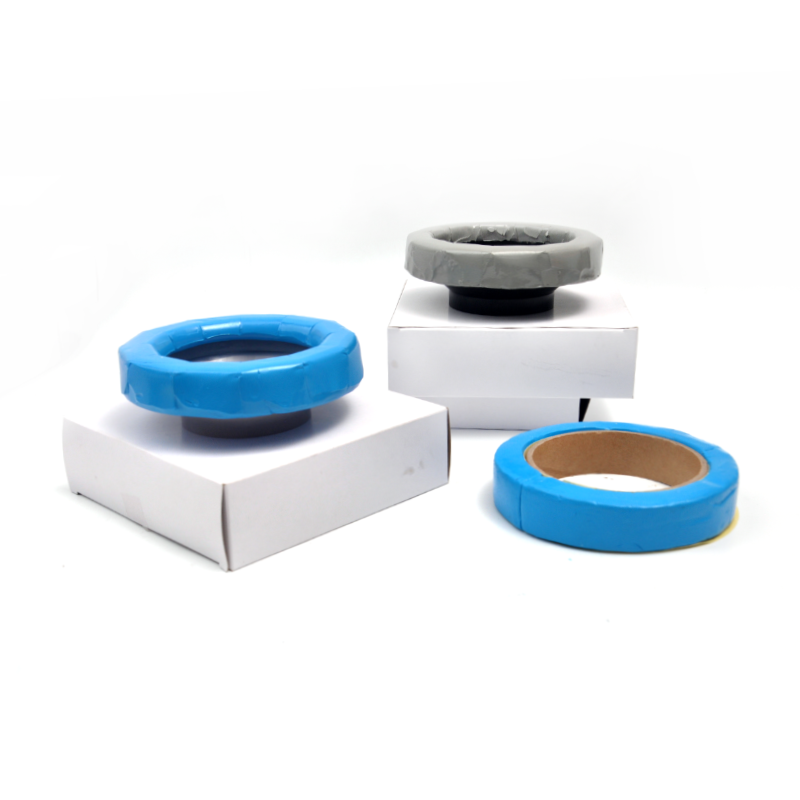
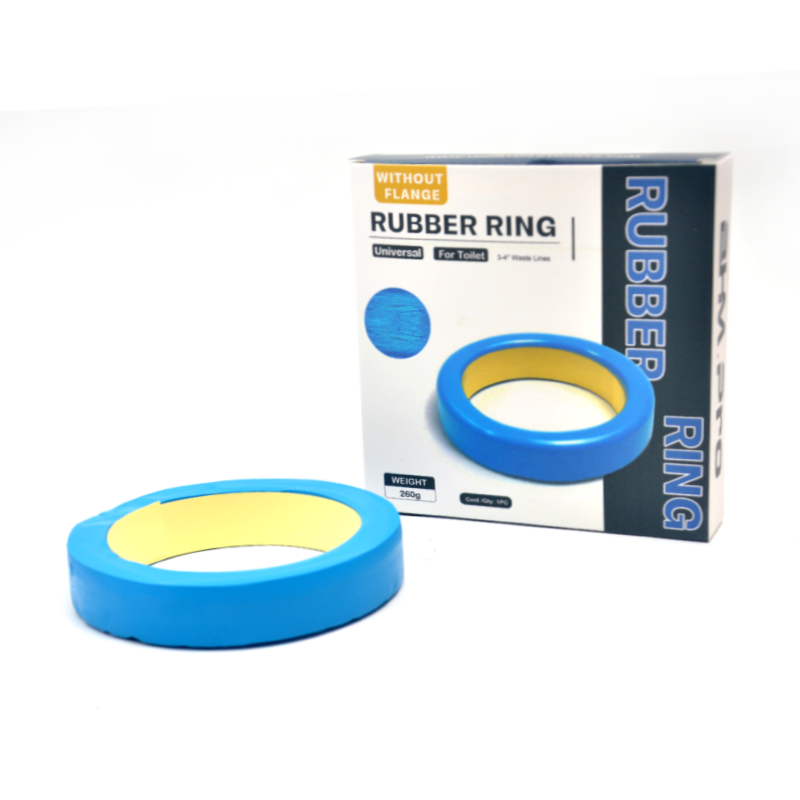
The toilet seal (also called a closet flange seal, wax ring, or rubber seal with putty) sits between your toilet base and the floor flange. It creates an airtight, watertight connection that:
- Stops sewage gases from entering your bathroom
- Prevents water from leaking onto the floor
- Reduces toilet wobbling
- Extends the life of your flooring and subfloor
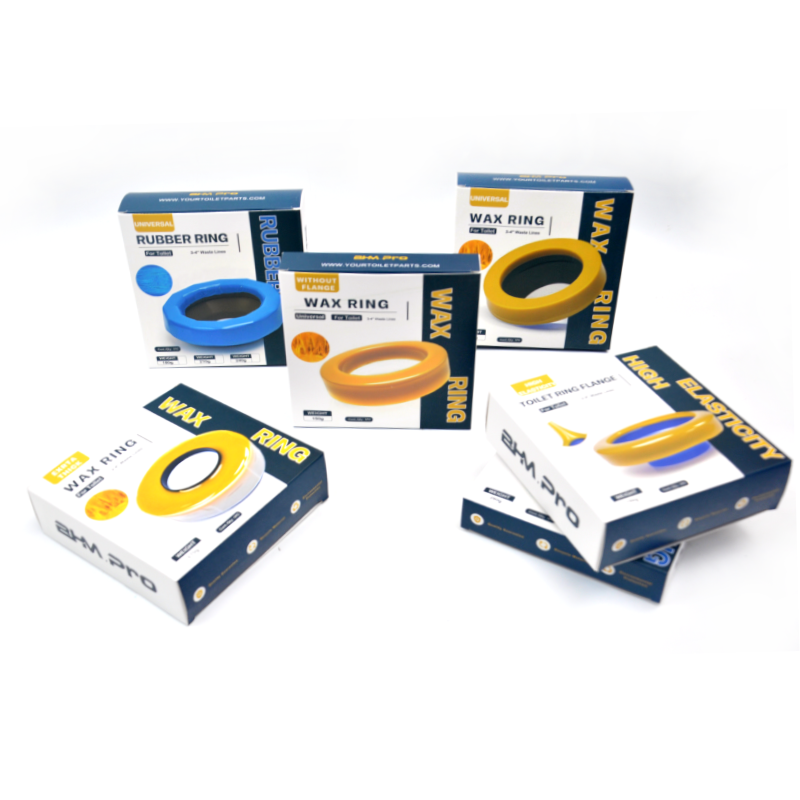
Modern rubber + butyl putty seals are more reliable than traditional wax rings—they don’t crack in cold weather, stick better, and fit most standard 3-inch and 4-inch flanges.
Tools & Materials You’ll Need
- New toilet seal (with putty or foam gasket)
- Gloves
- Rags / old towels
- Putty knife or scraper
- Adjustable wrench
- Bucket (for leftover water)
- Optional: small level
Step-by-Step DIY Toilet Seal Replacement
1. Turn Off the Water Supply
Locate the shut-off valve near the toilet base and turn it clockwise to close.
Flush the toilet to empty the bowl and tank.
Soak up any remaining water with a sponge or towel.
2. Disconnect the Water Supply Line
Use a wrench to loosen the flexible water hose connected to the bottom of the toilet tank. Place a towel underneath to catch small drips.
3. Remove the Toilet
Gently rock the toilet back and forth to break the old seal.
Lift the toilet straight up and set it on its side on a towel.
Be careful not to crack the ceramic.
4. Clean the Flange & Toilet Base
Scrape off all old wax, putty, or rubber residue from:
- The floor flange
- The bottom of the toilet Wipe clean so the new seal can stick perfectly.
5. Install the New Toilet Seal with Putty
Peel the backing (if your seal has adhesive) and place the seal centered on the floor flange.
Press firmly to secure it.
Most modern seals already include butyl putty for extra sealing—no extra putty needed.
6. Reinstall the Toilet
Lower the toilet straight down onto the seal.
Apply even pressure on both sides to compress the seal evenly.
Avoid twisting or shifting—this breaks the seal.
7. Reconnect Water & Test
Reattach the water supply line.
Turn the water back on and let the tank fill.
Flush 2–3 times and check:
- No water leaking around the base
- No foul odors
- Toilet is stable
Signs You Need to Replace Your Toilet Seal
- Water pooling around the toilet base
- Foul sewer smell in the bathroom
- Toilet wobbles when you sit
- Floor discoloration or softness
- Seal is cracked, dried out, or deformed
Pro Tips for a Perfect Seal
- Don’t use extra caulk on the seal itself—only on the outer base for aesthetics.
- Always replace the seal if you remove your toilet for any reason.
- Choose a rubber + butyl putty seal for better performance than pure wax.
- If your flange is below floor level, use a thicker or raised seal.
Final Thoughts
Replacing a toilet seal with putty is a fast, cheap DIY fix that solves the most common toilet problems. With the right seal, you can avoid water damage, bad smells, and expensive repairs.
If you’re looking for reliable, long-lasting toilet seals, wax rings, or butyl putty gaskets for residential and commercial use, we provide durable, universal-fit seals that work with most toilet models.

