
Understanding Toilet Bolts and Why Proper Tightening Matters
What Are Toilet Bolts and Their Role in Toilet Stability
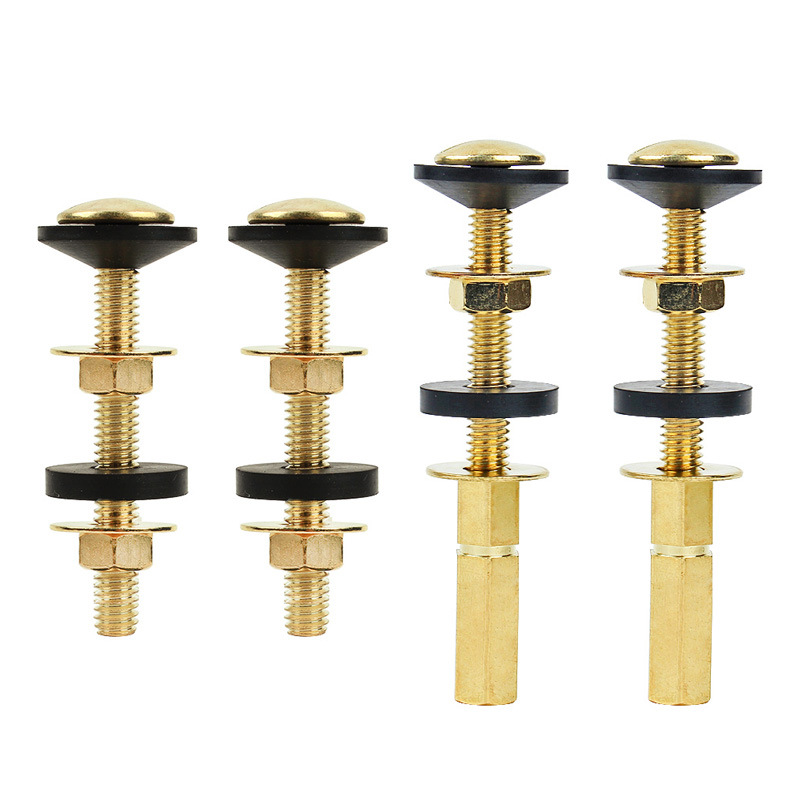
Toilet bolts (sometimes called closet bolts) are what hold the toilet down to the floor flange and the actual subfloor beneath it. Most commonly found in either stainless steel or brass versions, these little hardware pieces go right through the bottom of the toilet bowl and into that metal ring on the floor. Get them tight enough and they spread out the weight of the whole toilet evenly over the wax ring underneath. This creates that important watertight seal between the bowl and the drain pipe below. Without proper installation, water can leak out around the base causing all sorts of problems for hardwood floors or tile surfaces nearby.
Signs of Loose or Failing Toilet Bolts
When a toilet wobbles while someone sits down, leaves water puddled around its base, or makes those annoying little gurgles after flushing, it usually means the bolts holding it in place are either loose or starting to fail. Most of these problems come from things like old bolt sleeves that have worn out over time, rubber washers that went missing somewhere along the way, or just regular wear and tear from daily use plus all those tiny vibrations every time someone flushes. If this rocking continues without getting fixed, it can throw off how the waste drains properly, put extra strain on the pipes where they connect, and eventually lead to some serious leaks nobody wants to deal with.
How Improper Bolt Tension Compromises Wax Seals and Floor Integrity
When bolts aren't tightened properly, they let tiny movements happen that slowly wear away at the wax ring seal between the toilet and floor. Over time this creates little channels where wastewater can leak out underneath. Going too far in the opposite direction is just as bad though. If someone cranks those bolts down way too tight, it puts way too much pressure on the porcelain bowl. Porcelain isn't really built for that kind of stress since it's pretty brittle stuff. The Plumbing Safety Institute reported back in 2022 that nearly 8 out of 10 cracked toilet bases during DIY installations happened because people applied too much force. These cracks don't just look bad either. They lead to all sorts of problems like rotting wood floors, mold growing in hidden places, and costly fixes later on. That's why plumbers usually grab special wrenches designed to limit torque when installing toilets. Most pros aim for somewhere between 20 and 30 foot pounds of force. That's enough to hold everything securely but not so much that it risks breaking anything important.
Why Toilet Bases Crack: The Risks of Over Tightening Toilet Bolts
The reason why toilet bases tend to crack lies in the material they're made from. Most home toilets (around 92%) use porcelain for their construction, which just doesn't hold up well under tension compared to stronger materials such as cast iron. When someone over tightens those bolts holding the toilet down, they can push past the porcelain's breaking point at about 250 pounds per square inch. This creates tiny fractures that slowly grow until we see actual cracks forming. Once these cracks appear, the whole system starts failing. The wax ring seal gets damaged, and the connection between the toilet and the floor becomes unreliable. At that point, most plumbers will tell homeowners they need to replace the entire unit instead of trying to fix it. We've seen this happen time and again in our repair work across different households.
The Science of Porcelain Stress and Torque Pressure
Porcelain just doesn't bend when faced with uneven weight distribution. When someone tightens one bolt way before the other, it causes something called hoop stress that basically piles all the pressure onto the weakest spots in the porcelain base. Most folks aren't aware of this but the proper tightening range for those toilet bolts is actually between 20 to 30 foot pounds. Unfortunately, plenty of weekend warriors grab their wrenches and crank them down past 50 foot pounds without realizing what they're doing. This kind of overzealous tightening can lead to cracks forming in the porcelain within just a few short weeks after installation.
Common DIY Mistakes That Lead to Cracked Toilet Bases
- Improper tool use: Adjustable wrenches offer poor torque control; a 9/16” socket wrench allows more precise adjustments
- Single-bolt tightening: Fully tightening one side before the other amplifies stress on the opposite side
- Ignoring wobble diagnostics: 63% of cracks occur when users tighten bolts to stop rocking instead of first shimming the base to correct uneven flooring
Balancing Security and Safety: The Tight but Not Too Tight Paradox
Getting the toilet stable without squishing the wax ring too much is what we're after here. Most folks find that compressing it just about a quarter inch works best for most installations. What many plumbers suggest doing is switching back and forth between those bolts, turning them maybe a quarter at a time until they start feeling a bit tight. Throw in some rubber washers or nylon sleeves when installing and this actually spreads out the pressure pretty well. Some studies show these materials cut down on cracks happening around 40 something percent compared to just using metal parts all the way through. When everything's set right, there should still be just a tiny bit of give in there somewhere, maybe less than an eighth inch worth of movement, but definitely not so loose that it wobbles everywhere.
Step by Step: How to Tighten Toilet Bolts Safely and Effectively
Step 1: Diagnose Wobble and Determine Necessary Adjustments
Gently rock the toilet to test for movement. If the base shifts more than 1/8 inch, further inspection is needed. Remove the bolt caps and examine the threads for rust, corrosion, or stripping—early warning signs of potential wax seal failure. Address any visible damage before proceeding.
Step 2: Use a Torque-Limiting Tool to Prevent Over-Tightening
Using a torque limiting wrench helps maintain the right amount of pressure when installing fixtures, usually around 8 to 10 foot pounds as most plumbing codes suggest. Without this control, tiny fractures can form in porcelain surfaces that eventually turn into big cracks when too much force is applied. Regular wrenches just don't offer this kind of precision. Plumbers know from experience that about three quarters of all toilet base cracks come down to improper tightening techniques. The latest Plumbing Safety Survey backs this up with their 78% figure, though some professionals argue the actual number might be even higher based on field observations over the years.
Step 3: Alternate Between Left and Right Bolts for Even Pressure
When tightening bolts, go for quarter turns at a time and alternate between opposite sides just like when securing lug nuts on a vehicle's wheel. Doing things this way helps distribute pressure evenly over the flange surface and keeps excessive sideways force from damaging the wax seal. Most industry standards back up what experienced technicians already know - alternating bolts cuts down on seal stress by around 40% instead of going all out on one side before moving to the next. This makes sense because uneven tightening can really mess up the integrity of the seal over time.
Step 4: Monitor Wax Seal Compression to Avoid Leaks
Apply downward pressure on the toilet bowl, simulating normal use, while tightening. The wax ring should compress between 1/8 and 1/4 inch to form a reliable seal. Over-compression flattens the ring, diminishing its ability to self-seal and leading to leaks. Ensure the base makes uniform contact with the flange.
Step 5: Final Stability Check Without Forcing Rigid Positioning
Test the toilet with moderate hand pressure. A correctly secured unit will resist rotation and allow only about 1/16 inch of flex. If wobbling persists, consider realigning the flange or using shims rather than increasing torque. Forcing a rigid fit may lead to base fractures within 12 to 18 months.
Preventive Maintenance to Avoid Future Toilet Bolt Problems
Routine Inspection of Toilet Bolts and Surrounding Base
Toilet bolts should be checked roughly every quarter looking out for rust spots, mineral deposits building up, or when the tank seems off center from the bowl. Take a look at the space around where the toilet sits on the floor too. If there's any noticeable gap forming there, that usually means either the toilet has shifted position over time or the wax ring underneath is starting to break down. For cleaning, stick to gentle products like vinegar mixed with water instead of harsh scrubbing agents. When tightening loose bolts, do it bit by bit especially if there's just a little shake in the toilet. But watch out—if the bolts suddenly become really hard to turn, stop right away as this could signal something more serious going on beneath the surface.
Upgrading to Reinforced Bolt Sleeves and Rubber Washers
Standard steel bolts corrode 43% faster than coated alternatives, based on plumbing material studies. Upgrade to:
- Stainless steel or brass bolts
- Compression-limiting rubber washers
- Nylon-insert locking nuts
These components improve load distribution and corrosion resistance. After installation, test stability by gently rocking the toilet—movement beyond 1/8 inch suggests further adjustment is needed.
When to Replace Corroded or Stripped Toilet Bolts
Replace bolts immediately if you observe flaking metal, cross-threading, or rust stains on the porcelain. Reusing damaged hardware can compromise the flange and result in an unstable mount. Keep spare bolts in various lengths (2.5" to 4") to match different toilet models during replacements.

